

Mastering E2E Testing with Playwright: A Practical Guide
In software development, ensuring the reliability and functionality of an application is critical. End-to-end (E2E) testing plays a pivotal role in this process by validating the complete workflow of an application, from user interactions to backend responses. It’s not just about finding bugs—it’s about delivering software that users can trust.
For E2E testing, Playwright has been our tool of choice across projects. Its modern architecture, cross-browser compatibility, and robust debugging capabilities make it an indispensable framework for building dependable applications. Playwright simplifies complex testing scenarios, offering features like automatic waits, precise element handling, and API request interception—all of which are crucial for thorough testing.
In this article, I’ll share our approach to implementing Playwright for E2E testing. From setting up the framework to crafting test cases that ensure comprehensive coverage, this guide is built on real-world experience. Whether you’re exploring Playwright for the first time or looking to refine your testing strategy, the insights shared here will help you establish a robust testing framework and deliver reliable, high-quality software.
Setting the Stage: Why Playwright?
When it comes to E2E testing, the choice of framework can significantly impact the efficiency and accuracy of the testing process. Over time, we’ve consistently relied on Playwright for its ability to handle even the most complex testing scenarios with ease. Its versatility and modern features make it a standout tool for ensuring software reliability.
Cross-Browser Support
One of Playwright’s strongest advantages is its ability to test across multiple browsers, including Chromium, Firefox, and WebKit. This ensures consistent behavior for users, regardless of their browser of choice. For software used in critical industries like accounting, where reliability is non-negotiable, this cross-browser compatibility is invaluable.
Automatic Waiting
Playwright eliminates one of the most common challenges in automated testing: flaky tests caused by timing issues. Its automatic waiting mechanism ensures that tests only proceed when the required elements are available and ready, leading to more stable and dependable results.
Powerful Debugging Tools
Debugging can often be a tedious process, but Playwright simplifies it with features like tracing, which provides a visual replay of test execution. This makes it easier to pinpoint issues and fix them efficiently.
Comprehensive API
Playwright’s API offers developers fine-grained control over interactions with the application under test. Whether it’s handling network requests, simulating user inputs, or working with shadow DOMs, Playwright provides the tools to tackle any scenario.
Real-World Reliability
In our experience, Playwright has consistently delivered reliable results across various projects. Its robust design ensures that it not only detects bugs but also provides insights into potential edge cases. This makes it an ideal framework for applications that demand precision and stability, like accounting software.
Playwright’s combination of flexibility, reliability, and ease of use has solidified its place as a core component of our E2E testing strategy. With the groundwork laid, let’s dive into how to set up Playwright and start writing tests.
Initializing Playwright for the Project
To get started with Playwright, the first thing we need to do is set it up in our project. While the setup process is straightforward, ensuring it’s done correctly sets the stage for efficient and effective testing throughout the project. Let’s walk through the steps to get Playwright up and running.
Installing Playwright
The first step is to install Playwright. If you’re using npm, the installation is as simple as running.
npm install --save-dev playwrightThis will install Playwright and all the necessary browser binaries (Chromium, Firefox, WebKit), ready to be used in your tests.
Initializing Playwright
Once installed, we need to initialize Playwright to generate the necessary configuration files and structure. To do this, run the following command.
npx playwright initThis will create a basic folder structure for your tests, including a playwright.config.ts (or .js) configuration file, along with an example test in the test folder. These serve as a useful starting point that you can modify as needed for your specific project requirements.
Setting Up the Configuration File
Here’s where things get interesting. The configuration file allows you to customize how Playwright behaves in your tests. It’s the heart of your Playwright setup, where you define things like which browsers to test, how to handle retries, and which base URL your tests will use.
Let’s break down the most important configuration options that we use in our setup.
Key Configuration Options
testDir:
This points to the directory where Playwright will look for your test files. Keeping tests in a dedicated folder, like ./tests, helps maintain a clean and organized project structure.
retries:
This option specifies how many times Playwright should retry a failed test before marking it as failed. Setting retries: 2 is a great way to minimize the impact of intermittent failures in your tests.
use:
This section contains default settings that apply to all tests. Key options include:
- baseURL: The base URL for your app. Playwright will prepend this to all relative URLs in your tests.
- headless: This option determines whether to run the tests in a headless browser (no UI). Setting it to true is useful for running tests in CI/CD environments.
- viewport: Defines the default screen size for all tests, ensuring consistency across test runs.
- trace: Enabling tracing captures screenshots, network activity, and other details about the test, making it easier to debug failures.
projects:
This allows you to define multiple browser configurations. In our example, we’re testing across Chromium, Firefox, and WebKit to ensure our app performs well on different browsers.
Understanding the Playwright Configuration File
Now that we’ve covered the basics, let’s dive deeper into the configuration file and explore how you can customize it further for your project’s needs.
- baseURL from .env:
Rather than hardcoding the baseURL, which can become cumbersome if you have multiple environments (like local, staging, production), it’s better to use environment variables. This approach is clean and flexible, especially when working with different teams or CI/CD pipelines.
To use environment variables for the baseURL, follow these steps.
Install dotenv Package
If dotenv package is not installed, install it.
npm install dotenvAdd the URL in the .env File
In your project’s root directory, create a .env file (If not already created) and add the BASE_URL
BASE_URL=http://localhost:3000Update the Configuration File
Modify your playwright.config.ts to read from the .env file.
import { defineConfig } from '@playwright/test';
import * as dotenv from 'dotenv';

dotenv.config();

export default defineConfig({
  testDir: './tests',
  retries: 2,
  use: {
    baseURL: process.env.BASE_URL || 'http://localhost:3000', // Default to localhost if not set
    headless: true,
    viewport: { width: 1280, height: 720 },
    trace: 'on-first-retry',
  },
  projects: [
    { name: 'Chromium', use: { browserName: 'chromium' } },
    { name: 'Firefox', use: { browserName: 'firefox' } },
    { name: 'WebKit', use: { browserName: 'webkit' } },
  ],
});
Verifying the Installation
Once the configuration is in place, it’s time to verify that Playwright is working as expected. You can do this by running the following command to execute the default tests.
npx playwright testIf everything is set up correctly, Playwright will execute the tests, providing a summary of the results. This confirms that your installation and configuration are good to go!
Understanding the Test Cases
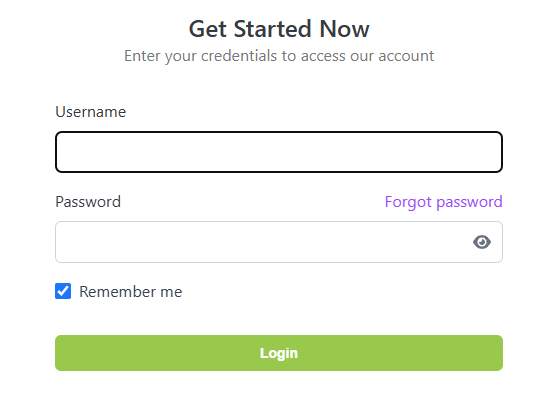
In our project—an accounting-based software tailored for an accounting firm specializing in dairy farm clients—ensuring a seamless and secure user experience is paramount. Among the various features, the login UI stands out as one of the most critical components. It acts as the entry point to the application, where accountants and administrators securely access the platform to manage financial data, generate reports, and perform daily tasks.
Testing the login UI is essential because it directly impacts the software’s usability and security. A minor issue here could lead to user frustration or, worse, security vulnerabilities. Therefore, in this article, I thought to get the test cases in the Login UI to explain our approach to validating this feature.
When designing test cases for the login UI, we focused on two primary objectives:
- Validating Core Functionality: The system must allow authorized users to log in successfully with valid credentials.
- Identifying Edge Cases: Testing how the system handles abnormal inputs, such as invalid emails or empty fields, ensures reliability under diverse conditions.
While the primary goal is functionality, these test cases also emphasize user experience by ensuring error messages are helpful and input validation is consistent. With this foundation, we’re ready to explore the implementation of these tests in detail.
Implementing and Enhancing Test Cases
In this section, we’ll translate the identified scenarios into actionable test cases, complete with code snippets and explanations. By doing so, we ensure that our application is rigorously validated for both functionality and resilience.
Basic Test Case Implementation
To start, let’s look at testing the most fundamental aspect: a valid login attempt.
Here’s how we verify that authorized users can access the application
test('Valid login functionality', async ({ page }) => {
  // Navigate to the login page
  await page.goto('/login');

  // Fill in valid credentials
  await page.fill('#username', 'accountant@example.com');
  await page.fill('#password', 'SecureP@ssw0rd');

  // Submit the form
  await page.click('button[type="submit"]');

  // Verify successful navigation
  await expect(page).toHaveURL('/dashboard');
});
Explanation
- Navigation: The test navigates to the login page and ensures it loads properly.
- Form Filling: Credentials are entered into the respective fields.
- Submission: The form is submitted, and the resulting behavior is checked.
- Validation: The test verifies that the user is redirected to the dashboard upon successful login.
Edge Case Testing
Edge cases ensure the system gracefully handles scenarios that deviate from the norm.
- Invalid Credentials:
A common scenario where incorrect login details should result in a clear error message.
test('Invalid credentials show error', async ({ page }) => {
  await page.goto('/login');
  await page.fill('#username', 'wronguser@example.com');
  await page.fill('#password', 'WrongPassword123');
  await page.click('button[type="submit"]');
  await expect(page.getByText('Invalid credentials')).toBeVisible();
});
2. Empty Fields:
Submitting the form without filling in credentials should trigger appropriate validation messages.
test('Empty fields trigger validation', async ({ page }) => {
  await page.goto('/login');
  await page.click('button[type="submit"]');
  await expect(page.getByText('Username is required')).toBeVisible();
  await expect(page.getByText('Password is required')).toBeVisible();
});
Additional Features to Test
- “Remember Me” Functionality:
If the application includes a “Remember Me” option, ensure it behaves as expected.- Verify that selecting “Remember Me” retains user credentials across sessions if the login is successful
- Verify that selecting “Remember Me” not retain user credentials across sessions if the login is unsuccessful
- “Forgot Password” Link:
Test the functionality of the “Forgot Password” link to verify it redirects users to the appropriate recovery workflow. - “Password Show / Hide” Functionality
Verify that the password show / hide functionalities are working correctly when the eye open / slash buttons are clicked.
By implementing these tests, we cover the full spectrum of login scenarios, ensuring the application is both user-friendly and secure.
Running the Tests
Once we’ve written the test cases, it’s time to execute them and analyze the results. Running Playwright tests is straightforward, but understanding the various options available can make the process more efficient and insightful.
Playwright offers multiple ways to execute your tests, catering to different needs—from quick runs in the terminal to more interactive, UI-based debugging.
- Running All Tests
The simplest way to execute your entire test suite is
npx playwright testThis runs all tests in headless mode (i.e., without showing the browser).
2. Interactive Test Management
For a more visual and interactive experience, use the Playwright Test Runner UI:
bash
npx playwright test --ui- The –ui option launches a graphical interface where you can:
- View your test suite structure.
- Run individual or grouped tests.
- Debug failed tests with a single click.
- This is particularly useful when dealing with extensive test suites or investigating failures.
3. Running Tests in Headed Mode
When debugging, it’s often helpful to see the browser in action. Use the –headed flag to run tests with the browser UI visible:
npx playwright test --headed4. Filtering Tests
If you only want to run specific tests, you can filter them by title using the -g option:
npx playwright test -g "Login functionality"By leveraging these commands, you can adapt your test execution workflow to your specific requirements, ensuring efficient debugging and management of your test suite.
5. Debugging Options
Debugging is an essential part of the testing process. Playwright offers several features to make debugging easier:
- Pause on Failures: To pause the test execution at the point of failure, use the –debug
npx playwright test --debugThis opens the Playwright Inspector, allowing you to interact with the browser and investigate the issue directly.
- Slow Motion and Video Recording: You can run tests in slow motion to observe the flow of actions in detail
npx playwright test --slow-mo=1000Additionally, configure the playwright.config.ts file to record videos of test executions for later review
use: {
  video: 'on',
},
Analyzing Test Reports
After running the tests, Playwright generates detailed reports to help you analyze results. The default HTML report includes:
- Test Results: A summary of passed, failed, and skipped tests.
- Error Logs: Detailed stack traces for failures.
- Screenshots and Videos: Visual references to pinpoint issues.
To generate an HTML report:
npx playwright show-reportBy leveraging these tools, you can efficiently debug and fine-tune your tests, ensuring your application is robust and reliable.
In our project we mostly used npx playwright test –ui command to test in the UI mode since it is more user-friendly.
Conclusion
Implementing Playwright for E2E testing has been a rewarding and insightful process in our accounting software project. From setting up the testing framework to writing and running comprehensive test cases, Playwright proved to be a robust and versatile tool tailored for modern web applications.
By leveraging its features—such as intuitive configuration options, effective locator strategies, and user-friendly debugging tools like the Test Runner UI—we ensured a high standard of test coverage. This meticulous approach not only safeguarded the login functionality but also reinforced the reliability and security of the application as a whole.
For software in the accounting domain, where precision and security are paramount, E2E testing plays a vital role. It allows us to replicate real-world scenarios, address edge cases, and deliver a seamless user experience. Playwright, with its efficiency and flexibility, has become an indispensable part of our development and testing toolkit.
To teams considering an E2E testing solution, Playwright offers the perfect balance of power and simplicity. Its ability to adapt to complex workflows while remaining approachable for developers of all skill levels makes it an excellent choice for projects across industries.
We hope this guide helps you navigate the process of integrating Playwright into your testing pipeline and inspires you to embrace robust testing practices in your development process. By prioritizing thorough testing, you not only build more resilient software but also gain the confidence to deliver exceptional value to your users.